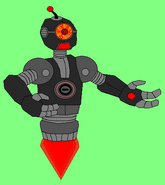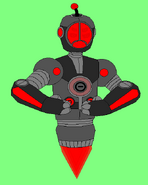
Omicron Title
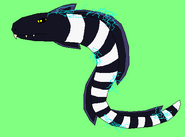
Omicron is a video game created by Kowalski and Sandy to go with their Pixotron virtual reality game console. The game requires only 10 players, and has 28 levels, 13 power-ups, and 7 main bosses. The bosses occur at the end of each 4th level. It has 10 VR Helmets that brings the players into the game. Its virtual world is in a random lands. The main villain is a electrical limbed mutant boa with size changing powers with the characteristics of Aku and Discord named Viral Vi-tor, who manipulates the virtual world, and intends to destroy the world, and remake it in his own image. The players are the only ones to put an end to his dictation, and save the virtual world.
Creation[]
Kowalski and Sandy had the idea of making a virtual reality game console to not just have fun, but to serve as an alternate form of training without bringing the complaints of Phil's rigorous training. They were able to create the console, called the Pixitron, but they didn't think it through, not bringing up the idea that they needed games to go with it. So they tried to make a game of their own to go with it. However, they had to face the United Universal Police Department who claimed that they were breaking the law by creating an unlicensed video game, and unless they wanted to get arrested, they would get permission from the government and pay for the rights.
Aggravated, and wondering whether their idea wasn't exactly a good one, they decided to go to the High Council for help, and they aided them with signing a contract with the UUniversal government to create a game for their console. They also needed money to pay for the rights, and balance the budget. So they got a loan from the bank, and used Mr. Krabs' charity connections to pay them off. Making the game wasn't easy. There was money spent putting together the graphics, especially for a new technology which meant a lot needed to be spent. Sandy and Kowalski were having a tough time, especially when they kept it a surprise from most of the Lodgers.
Though making the plot for the game was a pain, too. Kowalski and Sandy ended up trying to make the obstacles similar to those of other games, yet tried to make it less like stealing from them. But by the time they were finished, and they had created James Butterfly, the trick didn't work, and as the result of the game companies' complaints, they lost their rights to creating anymore obstacles and characters. So they were forced to use people from the real world such as the other Lodgers, and the UUniversal villains. It was a pain, but after 4 months, the game was finally completed.
Gameplay[]
The game has 7 chapters with 4 levels in each. The levels will take the players across many adventurous lands in an attempt to stop Vi-Tor. Vi-Tor has corrupted the formerly-friendly natives of Pixellania and created virtual clones of some of the Shell Lodgers' greatest foes. It's up to the 10 players to find a way to Defeat Vi-Tor and correct things. As the players progress, they gain power-ups. Each player starts with 5 lives and 2 continues. If a character loses all their lives, they are resurrected, using up a continue. If a player loses all of their continues, their game is over, and the player is transported back to the real world.
Pickup Items[]
The main items of the game.
- Omicoins- Collectible coins that can be sold for special upgrades.
- Big Omicoins- Coins that equal 50 Omicoins.
- OmiDollar- Equils 100 Omicoins, but now in paper form.
- Nanomedicine- Health pickups.
- Power Elixir- Increases team's attack power up to 5 for a limited time.
- Adrenalinoids- Makes team invulnerable for a limited time.
- Nucleic Tubes- Adds an extra life to a player.
- Scrap Metal- The main item to win the level which can be used to complete the portal to the next level.
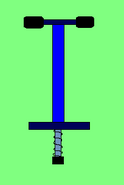
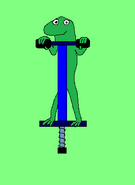
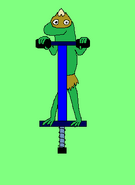
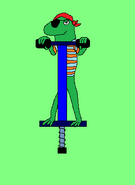
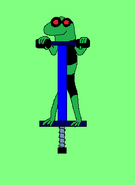
- Pogo Stick- After defeating a Pogo Frog of every version, you can you the pogo stick to jump and reach high places, or defeat most difficult enemies.
- Hiss' Notes- Provides tips on how to play the game. They give info about weapons, power-ups, enemies, and info on how to defeat a mini boss.
- Transmission Bots- Evil versions of Hiss' Notes from Vi-Tor that only appear in main boss battles at the end of every chapter.
Crates and Packages[]
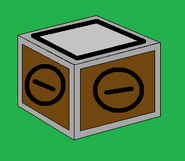
These are basically like the crates you find in Crash Bandicoot's World. They come in different varieties and are found everywhere in different levels. Some contain things that are useful, some can kill you. All you have to do to see what's inside is to smash them.
- Omicrate- The common crate of the game. All that's inside are a few Omicoins.
- Levitocrate- Crates that contains Omicoins. These are the only crates that can float in the air, or even hold other crates on top of it. You must find a way to reach high enough to get to them.
- Camoucrate- Crates that become untouchable when you get too close. The only way to smash them is by doing it at a distance.
- Placocrate- Crates that have steel armor attached to it because it contains more money than the Omicrates. Try finding an attack powerful enough to bust it open.
- Metallicrate- Crates that are made completely of steel. It cannot be smashed by even your most powerful attacks. They are useful for mostly platforming.
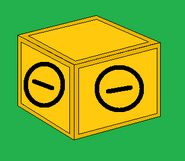
- Goldcrate- Crates that are made of pure gold and contain over a thousand Omicoins and OmiDollars, and are only found in the most hidden areas. Keep an eye out for them.
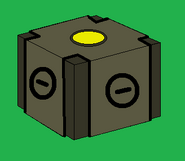
- TNT Crate- Crates full of TNT that explode in 3 seconds when touched. Be careful within it's blast radius. They can also make a great weapon against enemies.
- Nitrocrate- Crates full of nitro and explode when touched. But if you're careful, you can use this as a weapon against enemies.
- Ammocrate- Crates that contain vital equipment for Omicron. They contain weapon ammo. Whenever you run low on ammo, smash these crates to get more.
- Dynacrate- Crates that contain either a Power Elixir, or an Adrenalinoid.
- Aspricrate- Crates that contain Nanomedicine. Useful for refueling health.
Powerups[]
These are useful weapons and gadgets that are acquired every few levels. Use them well.
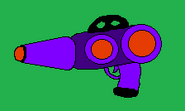
- Blaster- The first powerup that allows the player to blast a laser beam at a target.
- Electrogloves- A powerup that gives the player the ability to zap enemies.
- Plasma Grenades- A powerup that allows the player to throw an explosive at a target.
- Turboboots- A powerup that allows the player to double jump.
- Holoshields- A powerup that allows the player to open up a shield to block attacks.
- Electrobeam- A powerup that allows the player to fire powerful electrical beams.
- Laser Whip- A powerup that allows the player to use an energetic whip.
- Nanohive- A powerup that allows the player to lay a hive full of nasty nanobots.
- Blazooka- A powerup that allows the player to launch a fast and powerful explosive.
- Subatomic Rifle- A powerup that allows the player to blast enemies farther away.
- Gravitogun- A powerful that allows the player to levitate an enemy, and do anything.
- Chronocon- A powerup that allows the player to slow down time.
- Homuzooka- The final powerup that allows the player to launch homing missiles.
In-Game Places[]
These are important places which benefit the players.
- Mail Box- Checkpoints of the game. Should you lose a life, you come back at the Mail Box. Be careful though, some are obstacles.
- Krabs' Shack- Small shacks where Mr. Krabs sells helpful items for the game in levels or in the Hub Lair. In the Hub Lair, the shack sells character or weapon upgrades, health and power pickups, and ammo. But in the levels, the shack only sells ammo, and health or power pickups.
The Hub Lair[]
The Hub Lair is the briefing area of the game. Vi-Tor cannot reach this area, but can make transmissions there and continuously mock the players. This is where you choose which levels to enter, control the game settings, and buy upgrades.
- Options Room- Where you can adjust the game settings.
- Difficulty Switch- Where you can change from easy to hard. However, this is irrelevant as the levels get harder as you progress no matter how the switch is set.
- Level Dorms- Where you can start playing the levels by going through their portals. Portals must be unlocked by advancing previous levels.
In-Level/Hub Lair Characters[]
They are characters that are not enemies. They serve various purposes.
- Miguel and Tuilo- They run a torlly brige service. you must pay them money in order to pass through and go ferther into the level.
- Dr. Cockroach- He helps you enter new levels by using your collected Scrap Metal to create new level doors.
- Gilda- You can see her flying in place, and will help players (unless you can fly on your own) to reach hard to reach places or go across a gap.
- Trixie- For a price, Trixie can give you a portal view of where the next scrap metal is. becareful, she is pricey, but can be haggled with.
- B.O.B- Expect to see B.O.B standing near the bottom of cliff areas to be used as trableleans.
- Creeper- Not an enemy as a louge member in real life, but Creeper has a huge collection of Omi cash. Problem: the guy wants it for himself. He's invulable, so there's no worry of killing him when smacking him around for cash in levels.
- Shifu- He'll train you to use weapons properly.
- Chi-Fu- He is in charge of the Opisions room, Difficulty switch, the whole hub lair in general.
- Sir Hiss- Sir Hiss can be found in Sir Hiss's notes. He is also in the Level dorms, where you can ask what is adviseable and what to do correctly.
- Mr. Krabs- A mercent for "Mr. Krabs' shop." Be aware, like the real Mr. Krabs, he won't give out a freebe.
Boss Battle Tokens[]
Basicly pick-ups, but differnet, because they appear only in both Mini-Boss and Real Boss battles. they reange from members or allies of the louge that either heal your members, or do great damage to the boss, or prevent damage to you.
Healing Tokens[]
- Good Fairy Token- this token appears when a player takes to many damage. if touched, the Good Fairy appears, and heals the player to full health.
- Bambi's Mother Token- same as the Good Fairy. if touched, Bambi's Mother Appears, and gives the injured player a loving embrace, that both heals and grants brief invulableability.
- Jiminy Cricket Token- This token is a pretty basic one. touched, and Jiminy appears, and only restores 50% of your health. best used for when player suffers minual damage.
- Soothsayer Token- the medium one. Touched, and the Soothsayer appears riding on clouds. she says an anicent chinises chant that heals all players by 440% of health. perfect for when a group is damaged.
- Princess Celestia Token- Probuly the most powerful one of them all. Touched, and Celestia appears in all her shining glory, and casts a very strong healing spell and heals all players full health, brief invulerablelity, and a restock ammo.
Attack Tokens[]
- Lord Shen Token- If touched, Lord Shen lands from nowhere, and summons his powerful cannon, and deals great damage to Boss and all aiding minions.
- Boss Wolf Token- Touched, and Boss Wolf appears. he howls, and makes Wolf army appears for a limited time to battle the aiding minions, but can't fight boss. the Boss will also defeat away the wolfs.
- Hyena Token- Touched, and Shenzi, Banzai, and Ed appear and become guardains that attack the aiding minions only. be warned, they can be beaten off by the Boss.
- Mane Six Token- Touched, and the mane 6 appear, bareing the elements of harmony. they casted they're spiraling Rainbow and do a near death blow to the boss. because of this, Viral Vi-Tor ensured that a speical engrey shield is placed aorund this one and can only be powered down by a power-up.
- Po Token- Touched, and Po appears to do kick-butt awesome kung fu on both aiding minions and Boss.
- Furious Five Token- Touched, and the 5 appear to help you battle both the minions and the boss.
- Iago Token- Touched, and Iago appears, and litterly bad mouths the aiding minions with viral words that smash the minions.
- Cynder Token- touched, and Cynder appears, becomes Avator Cynder, and preforms a destistating blow to boss only!
Defense Tokens[]
- Mufasa Token- Touched, and Mufasa appears and grants the circle of life shield for a brief time or if too damaged.
- Oogway Token- Touched, and Oogway appears, and gives you the secrets of kung-fu shields that lasts only as long as 30 minutes or if taken alot of hits.
- Ignitus Token- gives Lougers a fire shield, which damages minions if player is touched. Bosses can harm players without worry of being burned.
- Squidward Token- Appears, and gives players music shields that has no time limit, but has a damage limit.
- Spyro Token- Touched, and Spyro appears and grants you Elemental shields, mixture of ice, thunder, and earth.
- Princess Luna Token- Touched, and the princess of the night appears, and grants the cover of the night, can take damage for a long time from both Bosses and Aiding Minions.
Levels[]
Chapter 1: Pixellania[]
Pixellania was a once-peaceful world of video game characters. However, the peaceful townsfolk started to act bizzare and actually hostile. Mayor Jerk Beetle is also corrupted, the theme park Hologram Fun World is now a death trap, and things would go bad to worse from here, as the viral snake-mutant that is Viral Vi-Tor started to appear on the town screen, announcing he rules everything, and plans to create 'the upgrade to true perfection'. The players must figure out his intention and also find and stop him.
Welcome to Pixellania[]
This is your path to the entrance of Pixellania. It will be treacherous and filled with baddies. Watch out for sinkholes, traps, and bad guys. Omicoins will be everywhere, including the trees. Collect as many as you can, you'll need them. Find the Scrap Metal you'll need to pass to the next level. But be careful, Vi-tor has hired a relentless asassin to go after you.
- Gained Blaster
Enemies[]
- Pogo Frogs- Weak little frogs with a pogo stick fetish. all they do is hop around all day. they fire their flaming tongues if player is too close. they can be defeated if you bounce on them or relect their tongues.
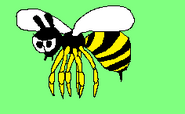
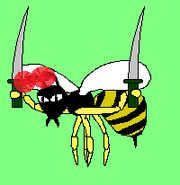
- Angry Bees- Simular to the giant bees in Donkey Kong. they can't be killed conventally by jumping on them, but a Pogo Frog's Pogo Stick will work on them.
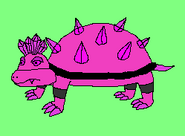
- Spikey Turtles- Basicly recolored versons of Baby Bowser from Mario. their shells are their defence against the player, but can be defeated once their head pops out. the defence is useless against the Pogo Stick.
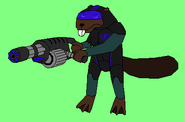
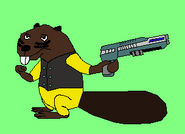
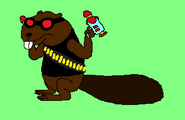
- Beaver Commandos- They walk around an shoot. can be bounced on.
- Monster Mail Boxes- pretends to be a savepoint mail box and attacks. it can't be destroyed without a power-up.
Mini Bosses[]
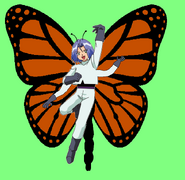
- James Butterfly- A butterfly version of James of Team Rocket. has a rocket launcher and fires madly!
- Health Power: 100
- Aiding Enemies: Beaver Commandos, Pogo Frogs, and Spikey Turtles
Research Facility[]
You've entered a top-secret research facility owned by Vi-tor's company of Omicron. Watch out for security, laser grid, and gas traps. There will be acid pools which you will have to cross, there will be baddies you'll have to get through, and traps you'll have to get past. Also, the security system is controlled by a robotic red-eyed menace.
Enemies[]
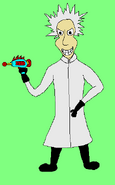
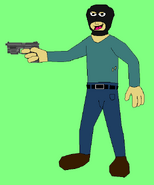
- Mad Scientist- A human madman with a machince gun. has an engery shiled defected only by power-ups.
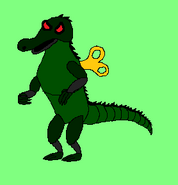
- Robocrocs- Recolor versons of the robotic toy crocs from the donkey kong 64 (type it up if you don't know). they are nearly indestructable, weakness is power-ups.
- Slammer Jammy- A hammer smashing happy jester clown jack in the box! defeatable once his hammer gets stuck, but after 5 minutes lefts it back up!
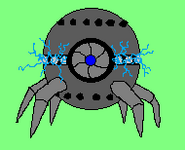
- Probes- Little advanced robotic balls of electirsity. destroyable only by power-ups, but reserected by the the probe launcher, which cannot be destroyed. stay clear of the launcher.
Returning Enemies[]
- Angry Bees
- Monster Mail Boxes- recolored to be green with red eyes, and robotic.
- Beaver Commandos- Now they chase you.
Mini Bosses[]
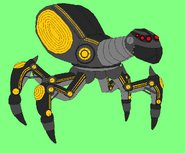
- Hal 3000 1/2- A comicly stupid verson of Hal 3000 from a space odditscy. surrounds player with Probe launchers. Luckily, it has a weak point for you to attack.
- Health: 100
- Aiding Enemies: Probes
Hologram Fun World[]
This theme park is a Japanese wonder that is now under the control of Omicron. There's holograms everywhere, and some can help you on your quest. However, even the holograms are corrupted, including the biggest star of the park.
- Gained Electrogloves
Enemies[]
- Japanese Angry Bees- Asinised versons of Angry Bee. armed with lazer guns and samari swords. Power-ups required.
- Sumo Pandas- Culturely incorrect Panda bears in japinese sumo wresters attre. body slams you. Bounding does not harm them unless player is power-uped.
- Hologram Machines- Machines that create invulnerable hologram enemies. The holograms can be stopped by destroying the machine. But it goes out with a big BANG!
Returning Enemies[]
- Pogo Frogs- Redesigned as anmarican tourests, and more stronger.
- Monster Mail Boxes- Now Japinese.
- Slammer Jammy- Instead of a jack in the box, now is an anime Samari Warrior and spins around hammer instead!
- Mad Scientist- Now Anime-ish.
Mini Bosses[]
- HOLOGRAM HAPPY FUN-TIME DOG- an annoyingly happy anime flouting dog head hologram that advertises really stupid and gross stuff like "Buttered Eel cookies".
- Health: 120
- Aiding Enemies: Japanese Angry Bees
Downtown Pixellania[]
Now you enter the city streets where people are monkeying around over Vi-tor's wrath. The streets are dangerous, and filled with loads of hazards. There will be hovercars racing towards you in the roads, there'll be an alligator that will try and eat you from below, and even the mayor is corrupted. But Vi-tor has something else in store for you, and it isn't friendly.
Enemies[]
- Police Drones- Robotic drones that fire lazers! easly destroyable via a jump on the head.
- Sewer Gator- An invulnerable alligator that tries to snag you from below sewer holes! Avoid at all costs!
Returning Enemies[]
- Probes
- Angry Bees- Now in Cop attre.
- Beaver Commandos
- Monster Mail Boxes- back to origenal design.
- Spikey Turtles- Now in cop attire.
Mini Bosses[]
- Mayor Jerkbeetle- A corrupt offictal on a hover limozine and fires lazers. He is encountered in the middle of the level, and will call in the big guns when defeated.
- Health: 120
- Aiding Enemies: Police Drones
Chapter Boss[]
- MegaOx- A mechanical bull which is armed with rocket launchers and probe launchers and charges at an incredible speed.
- Health: 300
- Aiding Enemies: Probes
Chapter 2: Underground Pixellania[]
Discription: After you escape from the madness indused city, you discovered the old mining fatiliy, where it looks abandon... or is it? becareful of a giant drillworm and mine hazards. Viral Vi-tor has also another surprase with the appears of real-life guest star villains.
Mutonium Mines[]
These are mines which scavenge for a valuable energy resource called mutonium. But some of these shiny rocks are sharp. You occasionally hop on mine carts, and ride across the long dangerous tunnels of this dark enemy infested mines. But these valuables are also posessed by an ancient curse that makes them alive. And Vi-tor has also sent a superweapon to hunt you down.
- Gained Plasma Grenades
Enemies[]
- Drillworm- First encounter. This is more of a run away part of the game then a fight.
- Miner 49ers- Very old miners with long beards, and old fastion guns. they are fortunatly weak from old age, and can be beaten via a bounce. Ammo: 1 (but can reload.)
- Giant Diamond Monster- Indestructable and attacks if you get too close. Avoid.
- Rats- little critters that just walk around. can be bounce apawn.
Returning Enemies[]
- Pogo Frogs- Now as minors, and throws pickaxes. appears only with James Butterfly.
- Monster Mail Boxes- In miner attre.
- Angry Bees- Now with lamps.
- Spiky Turtles- Now redesigned as smaller Diamond Monsters.
Mini Bosses[]
- James Butterfly- This is the very first mini boss before the level starts. Now with a blast canon!
- Health: 120
- Aiding Enemies: Recolored Pogo Frogs
- Rock King- he appears after you avoid Drillworm. his is rock hard, and, well, throws litteraly rocks. harmable only with Power ups.
- Health: 390
- Aiding Enemies: Rats, Giant Dimond Monsters
Villain Appearances[]
- Diamond Dogs- Sandy added real life villains into her game, as such, the Diamond Dogs were one of them. they were from Equestia. they throw diamonds at the players at certain parts of the game, and can only be scared off by a power up temorary until another encounter.
Mutonium Laboratory[]
Once you exit the mines, you go to the HQ of the mining facilities where scientists of Omicron research the mutonium. This lab is filled with many twists and turns. Some of the mutonium is radioactive, and can hurt you easily. There will also be titanium doors that can only be destroyed by a Plasma Grenade. But be warned, a robotic bad guy is back and out for revenge. But there's also a cartoon duo that still wants to take over the world.
Enemies[]
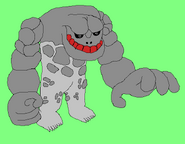
- Rockman- they escape from their cages and charge at the player! destroyed only with power-ups.
- Lab Rats- smarter verson of the normal rat. they can actselly fire lazers at you. they can be beaten by a bounce.
Returning Enemies[]
- Drillworm- Second encounter. Chase again after Pinky and the Brain are defeated.
- Mad Scientist
- Probes
- Police Drones- Changed into more secureity attire.
- Robocrocs
Mini Bosses[]
- Hal 3000 1/2- Same powers and health limit as before, but now with more aiding minions then just the probes.
- Health: 100
- Aiding Enemies: Probes, Police Drones, Lab Rats, Mad Scientist
Villain Appearances[]
- Pinky and the Brain- After Hal is defeated, Pinky and the Brain showed up, and they brought with them a generator robot that makes more Lab Rats. it was buildt with phasers.
- Health: 120
- Aiding Enemies: Lab Rats.
Acrid Geysers[]
Now you enter a dangerous sector inside a very hot volcano. This area is full of toxins and fire pits. Watch the geysers that spray toxic gas. This place is also half-way molten, so watch wherever it's hot. There will also be places too high for you to reach that only one power-up will help you with.
- Gained Turboboots
Enemies[]
- Acid Shrews- Acidic mutant Shrews crawl all over these parts they shoot acid. they can regnerate after getting killed via power-up.
Returning Enemies[]
- Drillworm- Third encounter. Chase again. encountered when you get closer to the goal area.
- Miner 49ers
Mini Bosses[]
- James Butterfly- you have to fight him during the worm chase. same powers as the last fight from the mines.
- Health: 120
- Aiding Enemies: Acid Shrews
Magma Caves[]
You are now in the center of the volcano where there is a pitful of molten magma. The hot rocks in these firey pits are also under the same ancient curse, and many molten Lava Men will try and burn you to charcoal. Watch for hot spots, fire pits, and even the lava pit. Soon you will confront the dreaded leader of the Lava Men, and eventually the deadly superweapon that Vi-tor has sent to kill you.
Enemies[]
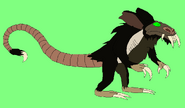
- Mini Drillworms- roughly the size of big Anacondas, they are mini-mes to the boss. appeared only with the Drillworm.
- Lavaman- they are hostile and hate visiters. they spit lava spit. harmed only by power-ups.
Returning Enemies[]
- Probes
- Giant Diamond Monsters
Mini Bosses[]
- Lava King- Appears before the battle against the Drillworm.
- Health: 140
- Aiding Enemies: Lava Men
Chapter Boss[]
- Drillworm- Final showdown. faced at the end of the level, blocking your exit. fires missles at you. You just need to hit it 24 times until there's no sections of it left.
- Health: 24
- Aiding Enemies: Probes, Mini Drillworms
Chapter 3: Pixeltanus Mountains[]
The Pixeltanus Mountains are ordenarly peaceful mountains... However, now are crawling with Vi-Tor's Air and Mountain forces. there is talk of a lone wise man who claims who once knew, in fact, may be involve of what caused Vi-Tor to be like this. can you reach him before Vi-Tor gets wise on what's going on and does something preventive?
Road to The Pixeltanus Mountains[]
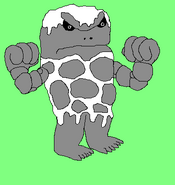
This passageway is hazardous and deadly. It's filled with abominable snowmen, and quicksand. The lakes are also freezing cold, so do not fall in. But the rockmen have returned, and this time they're covered in snow, and are using icicles as weapons. But there's also a familiar face that's blinded by darkness.
- Gained Holoshield
Enemies[]
- Yeti- A beast of legend that throws giant snowballs and boulders and is protacted by a far distence. Range weapons required to fight.
- Skybomber Stork- They shoot down from above! Act fast!
Returning Enemies[]
- Pogo Frogs- Now dressed as Eskimos.
- Rockmen- Now covered in snow.
Villain Appearances[]
Denahi- This virtual version of the normally-good Denahi has been corrupted, and must be faced.
- Health: 180
- Aiding Enemies: None.
Ice Caverns[]
You have entered icey caves to take shelter from the growing cold temperatures outside. But little do you know that these caves are full of hibernating bears that aren't friendly. But be prepared to meet the biggest of the lot.
Enemies[]
- Bears- These guys are nothing like the bears from "Brother Bear."
Returning Enemies[]
- Rockmen- Well, duh, it is a mountain.
Villain Appearances[]
Corrupt Bear (Fox and the Hound)- Fagin's corrupted Bear returns without mentained Fagin.
- Health: 210
- Aiding Enemies: Bears
Darkness Forests[]
The cold weather has died down, and now you're wandering off through a dark and creepy forest. Be careful because the trees are ALIVE! These forests are filled with many dangerous enemies that you'll want to avoid. But there's also some more familiar faces that fight like men. Little do they know you've gained a secret weapon.
- Gained Electrobeam
Enemies[]
- Jerk Trees- These guys got issues. They punch you if you get too close. avoid.
Returning Enemies[]
- Bears
- Angry Bees
- Beaver Commandos- Now with stronger weapons
Villain Appearances[]
Ronno: the former friend of Creeper, Djon, and Pain and Panic comes for payback.
- Health: 54 (Rages will make durability stronger)
- Aiding Enemies: None
Fagin: The evil vulture guards the scrap metal, and has even taken it.
- Health: 250
- Aiding Enemies: Hound Dogs
Hound Dogs: The Villain League's hound dogs charge at you from nowhere. They are in huge groups.
Uncharted Cabin[]
When you finally reach the exact coordinates of where Vi-tor's history first started. You must reach an uncharted cabin in the middle of nowhere. But watch out, this bad guy is watching your every move aiming a Shockgun at you. Enemies:
Chapter Boss[]
Viratos Program- The Viratos Program is respondsable for the reason why Vi-Tor is like this, and even knows that it's all his fault. He will tell you what you must do, but only if you defeat him, only then he will admit the tragic history... with his own son.
- Health: 400
- Aiding Minions: None.
Chapter 4: Sindred City[]
You have been directed to go to Sindred City, a lawless city filled with nothing but dirty criminals, smugglers, street gangs, and some familiar faces.
Nightmare on Elmer Street[]
Twice as dangerous as Elm Street. It's filled with many mad criminals armed with many kinds of weapons. Even people in cars are trying to blow your brains out. The streets are ruthless and greedy, and snipers will be all over the place. But once you get to a subway, you'll cross paths with the most evil loan shark ever known.
- Gained Laser Whip
Enemies[]
- Driveby Shooters- Invulnerable thug cars that shoot at random.
- Gangsters- Attack in a group. Defeat them all while you can.
- Cleavers- Armed with knives. Be very careful.
- Snipers- Watch the buildings for a shining light which will be a sniper trying to shoot you. Be as quick as you can.
Returning Enemies[]
- Pogo Frogs- Now as thugs.
- Angry Bees- As a thug.
Villain Appearances[]
Sykes- He and his Dobermans appear as soon as you reach the end in a subway. Sykes will block your exit, and chase you in a subway as his Dobermans attack.
- Health: 340
- Aiding Enemies: Dobermans (Health for each: 5 Laser Whip strikes)
Roscoe and Desoto- 66. Once you defeat Sykes, you'll jump off a bridge as he is hit by a train while Desoto and Roscoe jump with them. Then once you get to shore, you battle the Dobermans again.
- Health for Each: 400
- Aiding Enemies: Rats
Danger Alley[]
After defeating yet another enemy, you enter a haunted alley known as Danger Alley. Nobody in Sindred City comes to this alley because they know it's filled with living dumpsters that can swallow them whole. Yet some brave criminals wander around this alley to litter. But there's a bad kitty cat that wanders across the alley waiting to strike.
Enemies[]
- Monster Dumpsters- Living Dumpsters that will eat you alive. Tread carefully.
- Alley Dogs- Rabid and feral dogs that jump on you and drain your health slowly while clawing and biting you. The only way to defeat them is the Laser Whip.
Returning Enemies[]
- Pogo Frogs- Now in hobo clothes.
- Spiked Turtles
- Rats
- Lab Rats
- Gangsters
- Cleavers
Mini Bosses[]
James Butterfly: Now with a plasma sniper rifle. He peeks out of the windows aiming his sniper at you. The camera is on James Butterfly's POV scoped through the sniper, and the player has to find a way to deflect the blasts back at him. Once you do that enough times, he's defeated once again.
Villain Appearances[]
Tai Lung- He appears at the end guarding the scrap metal. Be careful when he uses his nerve attack.
- Health: 410
- Aiding Enemies: Gangsters, Cleavers
Smuggler's Cove[]
This place is the holy grail of illegal drug smuggling. Many illegal drugs have been smuggled here and don't need to be mentioned what they're called. You shouldn't be here, but it's the only way to get to the Dump where you'll find more info on Vi-tor. Watch for gangsters, smugglers, and other dirty criminals, including the baddest scorpion smuggler in Pastoon.
- Gained Nanohive
Enemies[]
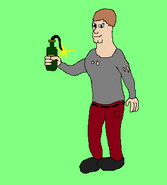
- VBombers- Smugglers that light up flammable vodka as a grenade. Stay out of the range when the vodka explodes.
- Psychoes- Drunk baddies that spin around with a knife. Once he gets dizzy, attack him.
- Gunners- Watch out! These guys are invulnurable baddies that hide and wait for the moment to shoot you with their rifles.
Returning Enemies[]
- Pogo Frogs
- Gangsters- Here, they're in greater numbers, so use the Nanohive.
- Cleavers- Now they have 2 knives.
- Beaver Commandoes- Now in stealth attire, and being here for two reasons: busting the smugglers, and capturing you. Watch out for their sniper rifles.
- Angry Bees- They now have Vodka in their stingers, so do NOT get stung, otherwise you'll be dazed off for a few seconds, giving the enemies enough time to beat you up.
Villain Appearances[]
Dead-Eye Monroe- He's back, and waiting for some vengeance.
- Health: 450
- Aiding Enemies: Gangsters, Cleavers, Psychoes, VBombers
Down in the Dumps[]
You've finally made it to the dump. But this dump has been cursed by Vi-tor to kill you. You have to find some notes written by Vi-tor that have been thrown away months ago. But once you find these notes, you'll find out it's being guarded by a very very VERY big trash heap.
Enemies[]
- Junkmen- Beings made of pure garbage. Just hit one once, and it's done. That's why these monsters attack in groups, and are incredibly strong.
- Ragdolls- Living stuffed dolls that jump on you and squeeze the life out of you. They trap you in sticky melted stuffing, and kill on sight. Kill them as quickly as possible.
- Xenoplastic- Walking creatures wrapped with plastic like a mummy. Destroy it by setting it ablaze using a Plasma Grenade.
Chapter Boss[]
Colossal Junk Monster- This unusual beast has vital info on Viral Vi-tor that you must have. Defeat him. First, you must set the creature's legs, arms, and body on fire using the blaster, burning away it's paper and plastic skin, revealing his garbaged body. Then, you must somehow charge a plasma grenade with fire, and pack a punch powerful enough to sink the beast into the ground. After that, you must use Plasma Grenades to do enough damage to it's head, and blow it off, finishing him off.
- Health: 900
- Aiding Enemies: Junkmen and Ragdolls.
Chapter 5: Forbidden Jungle[]
Discription: you discovered a jungle that is made forbidden for some reason by Vi-Tor... perhaps, it's because that, somewhere in the jungle, it pin-points where Vi-Tor is hiding... and tells the truth of his "Perfect Upgrade" as a doomsday propitcy? Vi-tor is starting to get serious with the Real Life Guest stars.
Jungle Bungalo[]
You are now headed for the depths of the Forbidden Jungle. You must find some hidden blueprints that are hidden somewhere in the jungle. You must swing from vines, climb trees, swim through water, cross carnivorous plants, and come across a prehistoric foe of yours who's dying to get some revenge.
- Gained Blazooka
Enemies[]
- Hunters- British Hunter stereotypes hired to hunt down the player. can be knocked off by bounce.
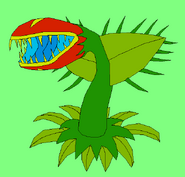
- Giant Venus Flytrap- Giant plants that hunger for meat. They can only be defeated with the Blazooka.
Returning Enemies[]
- Pogo Frogs- Now as natives, and pogo stick now a bouncy spear.
Villain Appearances[]
- Disney Dinosaur Raptors- they just attack in groups.
- Lord Dread's Raptors- they wait for player to get close and charge.
Disney Dinosaur Carnotaurs- These past foes are back and angrier than ever.
- Health: 600 each
- Aiding Enemies: DD Raptors
Lord Dread: Can be faced after the Carnotaurus is defeated.
- Health: 680
- Aiding Enemies: DD Raptors and LD Raptors
Clayton- He has been hired by Vi-Tor to get you for a whole lot of money like the rest of the Hunters out there. Be careful while fighting him when he's armed with his gun. Get too close, and you'll be blasted.
- Health: 700
- Aiding Enemies: Hunters
Swampy Marshes[]
Having made it through the jungle, you must now cross the dangerous swamps. Some waters will be safe to swim through, but others will be infested with piranhas and electric eels. There are also giant insects waiting to kill you. The Blazooka will not work underwater, so the underwater baddies must be distracted or avoided. And pretty soon, you will cross paths with the biggest fish in the swamp.
Enemies[]
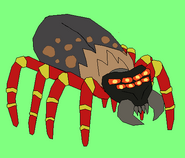
- Giant Tarantulas- Giant spiders that dangle down from the trees and try to eat the player! They must be avoided, for they are invulnerable.
- Electric Eels- Powerful eels that zap the players whenever they get into contact with them in the swampy waters.
- Piranhas- Flesh-harvesting fish that will instantly chow down on anything they find in the water. They can only be distracted by something tender and yummy.
- Giant Centipedes- Very lage centipedes that kill on sight. Their bites contain venom that slowly drains the health out of a player until the venom wears out in 3 seconds.
Returning Enemies[]
- Rockmen: Now redesigned with mind-controlling devices. Only appears with James Butterfly.
Mini Bosses[]
James Butterfly- Now with a flame thrower. He stays fighting until the Megapiranha eats him...though this doesn't make him as dead as you might think.
- Health: 300
- Aiding Minions: Rockmen.
Megapiranha- A giant piranha that will try and chomp down on anyone it sees in the water. It swims at incredible speed, and will occasionally jump out of the water to try to catch you. Just find some meat to distract it long enough for you to Laser Whip it.
- Health: 800
- Aiding Enemies: Piranhas
Treetops[]
To take cover from the Megapiranha, you retreat to the treetops. But even in the safest of places, there's danger. Vi-tor will create crazed clones of Tarzan that will try to kill you, and there are also predators that lurk in the treetops. Sometimes the Tarzan clones will be farther from your reach, so luckily, you have a secret weapon to take care of those annoying Tarzan wannabes.
- Gained Subatomic Rifle
Enemies[]
- Tarzanians- Crazed clones of Tarzan created by Vi-tor that throw coconuts at intruders! They can be beated by a bounce when they land and imitate the Tarzan yell! They can also be farther away than you can reach, so try using the Subatomic Rifle to strike them out of the trees and let them die humorously yelling the Tarzan yell.
- Leopards- They walk around and pounce on any prey that gets too close. Can only be defeated with the Laser Whip.
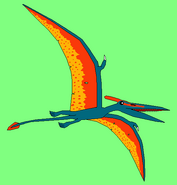
- Pteronodons- They swoop down and try to eat you. They can only be beaten by the Subatomic Rifle.
Returning Enemies[]
- Pogo Frogs- Same at the Jungle Bungalo level
- Angry Bees- Now jungle-esque
Villain Appearances[]
- Fossa- They are in groups. but all can be blasted away by the Blazooka or backed off by the Laser Whip.
Sabor- Waits for you at the end of the level and charges at you and tries to slash you up!
- Health: 490
- Aiding Enemies: Leopards and Fossa
Sandy Beaches[]
These beaches are the exact coordinates of where the blueprints for Vi-tor's secret device will be held. Yet these beaches are not safe either. There are crabs, alligators, giant worms, and even a notorious pirate enemy of yours. After you defeat him, you cross paths with a prehistoric croc that is a bad, bad killer.
Enemies[]
- Crabs- They snap at you if you try to bounce them, so try a different tactic.
- Seagulls- They drop poo at you! avoid, because they can't be hit with their speed!
- Crocodiles- They are just as you think they are, very bitey and big meanies.
- Sandworm- They pop up and try to eat you! They can't be killed, so best avoidable.
Returning Enemies[]
- Pogo Frogs- Now as pirates with shovels.
- Angry Bees- Now as pirates.
- Rockmen- they appear when Gianto's rock smashes open!
Mini Bosses[]
James Butterfly: Now holds a mini cannon. He appears when you get to a rock formation, and when you defeat him, he will get eaten once again by the T-Rex.
- Health: 300
- Aiding Enemies: Pogo Frogs
T-Rex- Appears somewhere in the middle of the Level.
- Health: 540
- Aiding Enemies: Sarcosuchus (Throwing objects at the player)
Villain Appearances[]
- Captain Hook's Pirates: they charge out of nowhere at you! bounces can beat them!
- Tick-Tock: He pops-up from the sand every time the player stands on the same spot for too long during the Captain Hook battle, but once Hook is defeated, Tick-Tock pops out, and chases him, only for him to be chased off by Sarcosuchus.
Captain Hook: Appears right before Sarcosuchus. He has his sword, cannon, and unlimited pirate forces at the ready until he is attacked by Tick-Tock, only for Tick-Tock to retreat at the approach of Sarcosuchus, as well as Captain Hook and his crew.
- Health: 700
- Aiding Enemies: His pirates.
Chapter Boss[]
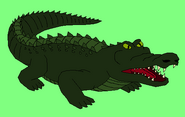
Sarcosuchus- A prehistoric behemoth that appears all throughout the level via the murky ocean waters. It stands and waits for the moment to strike (determined by the bubbles), and pops out of the water and strikes. When you reach the ocean docks, you must face it head-on. Watch it's movements in the water, and do not fall in. The Sarcosuchus will also crawl on the land you retreat to the docks, and try and bite you, or lash you with it's huge tail. It's hide is too thick to be attacked, so use the Subatomic Rifle to shoot at it's weak spots.
- Health: 900
- Aiding Enemies: Crocodiles, Seagulls.
Chapter 6: Viral's Destruction[]
Discription: You've found the blueprints, and have discovered that Vi-tor has created a giant flying generator called the Pixiliminator. The generator tears apart Pixellania pixel by pixel, and remakes it in Vi-tor's own image. But it's too late to warn the cizistions, and Viral begins his doomsday! Everything is going to crud! What's worse, Viral is bring forth more of the lougers past foes.
Terrorized Street[]
Viral's Pixiliminator is destroying the city, and you can't do anything about it for now. All you can do now is GET THE HELL OUT OF THERE! The Pixiliminator will blast rays that will take apart each building pixel by pixel. Avoid it's powerful ranges. The destruction will sometimes affect your escape, but that's no problem for you since you have a new gadget.
- Gained Gravitogun
Enemies[]
- Repixilized Police Drones- Thanks to Vi-Tor's machine, these drones have now become more brutal and stronger, and scary looking.
- Looters- They burst out jewelerys and shoot at random! either avoid or bounce them!
Obstacles[]
- Runaway Cars- They drive out of control, and will smash into random things! avoid the area they crash into!
- Falling Pixel Bombs- They appear among pixelated storm clouds and are very dangerous. Avoid at all costs.
- Energy Shockwaves- Destructive energy released by Vi-tor's Floating Generator. When a purple light is seen glowing in one spot, stay away from the area, or the player will get struck by the destructive energy.
Returning Enemies[]
- Pogo Frogs- now as Viral Vi-Tor's soldiers.
- Angry Bees- Now as robotic bees.
- Police Drones- now just there to get captured by Corrupted Police Drones and become them.
- Rats- scampering in swarms now!
- Commando Beavers- Now as Viral Vi-Tor's soldiers. newly armed with lazers.
- Mad Scientist- Now generates Lab Rats.
- Lab Rats- Now creates Holographic shields.
Mini Bosses[]
James Butterfly: Now re-pixilated into a near-clone of Mothra.
- Health: 1000
- Aiding Enemies: Repixilized Police Drones
Mayor Jerk Beetle- Now re-pixilated into a cybernetic glitchy giant.
- Health: 500
- Aiding Enemies: Repixilized Police Drones
Doomsday- A gigantic robot that appears after you reach the end. This is the most dangerous of Viral Vi-tor's creations.
- Health: 1050.
- Aiding Enemies: Commando Beavers, Repixilized Police Drones, Mad Scientists, Angry Bees
Villain Appearances[]
- Villain League Shocktroopers: Appear in large numbers. Power ups required for a quick finish.
Rourke and Helga: This duo fights together and appears somewhere in the middle of the level.
- Health: 400 each.
- Aiding Enemies: Villain League Shocktroopers
Apocalyptic Wasteland[]
You have found shelter from the chaos, and now the town is an apocalyptic wasteland filled with dust and debris. You must find a way to get across this wasteland, and avoid hazardous areas like acid pits, oil slicks, toxic geysers, quicksand, sinkholes, tar pits, and wasted enemies. Do what you can to survive even 60 seconds in this chaotic conundrum. But be warned, a familiar mutant frog shows his face once again.
Enemies[]
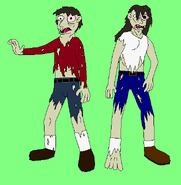
- Zombies- they rise from the ground.
- Giant Cockroaches- Surviving the destruction, these giant bugs are destructive creatures. They can only be killed by a power-up.
- Creepozoids- Mutated creatures that spit venom, and can heal after a blow from a power-up. The only way to beat it is to zap it.
Returning Enemies[]
- Pogo Frogs- Same as last level.
- Rats- Now mutanted, and can jump on your head, and attack you.
- Lab Rats- now with big brains, making them smarter, stronger, and more immune to attack.
- Acid Shrews: Still the same.
Mini Bosses[]
HOLOGRAM HAPPY-TIME DOG- Now re-pixilated and upgraded into a hideous monstrous werewolf head with crushing holographic hands. He shoots fireballs and spawns Pogo Frogs and Rats.
- Health: 500 (Now slowly regenerates)
- Aiding Enemies: Pogo Frogs, Rats
Villain Appearances[]
- Hank's Mutant Animal Zombies- They are now all over the place, yet stronger than the other zombies. They only appear while battling with Hank.
Hank the Mutant Frog- Throws mutating worms at you and has a jetpack.
- Health: 700
- Aiding Enemies: Mutant Zombies
Refuge Building[]
You are being ambushed by the Pixiliminator's power, and you manage to take shelter in a building that is about to collapse. By the time it does, the Pixiliminator's energy will be gone. Things in this level will go faster than you can dodge like the enemies, the collapsing building, and the growing fire. You cannot dodge these dangers, so that's why you have a new type of gadget that allows you to slow down time.
- Gained Chronocon
Returning Enemies[]
- Rats
- Lab Rats
- Pogo Frogs
- Commando Beavers
- Repixilized Police Drones
Villain Appearances[]
Dr. Nefarious- Nefarious hacked himself into the body of the destroyed Doomsday, and is now using it as his own.
- Health: 1100
- Aiding Enemies: Repixilized Police Drones
Rooftops[]
The building has completely collapsed, and you retreat to the rooftops. However, Vi-tor has decided to go to Plan F: Unleash the 'Ultraweapon'. When all seems calm, a gigantic war machine starts chasing you down through the rooftops of the apocalyptic wasteland. You must run across the rooftops destroying anything that gets in your way. And the War Machine is extremely quick, so don't forget to use the Chronocon.
Returning Enemies[]
- Repixilized Police Drones
- Beaver Commandos
- Angry Bees
Chapter Boss[]
War Machine- A hideous recreation of Doomsday mixed with what was left of James Butterfly's mothra form and Mayor Beetle's mega form. It will chase you throughout the rooftops until the end of the level.
- Health: 1500
- Aiding Enemies: Repixilized Police Drones
Chapter 7: Viral's Industrial Park[]
Discription: When the War Machine is destroyed, the Pixiliminator activates it's rebuilding phase, and picks up all the pixels in the apocalyptic wasteland, and creates a large industrial park. The players have also found Vi-tor's stronghold located not far from their position. In order to get there they must cross 2 factories. Once you get there, you might be able to find a way to destroy the Pixiliminator and reverse everything back to the way it was. Now go out there and FINISH THIS!
Industrial Weapons Factory[]
First, you must cross the Weapons Facility, where loads of futuristic weaponry is being manufactured. There, you also find an advanced superweapon used in a classified project. Use this secret weapon to your advantage. You need to use this homing weapon to make it through acidic pits, firey welding pits, ultrasecurity, and even a great number of your evil foes.
- Gained Homuzooka
Enemies[]
- Repixilized versions of all common enemies from past levels.
- Industrial Monster- A monster created by the waste of the industrial. It spits acid, and is incredibly strong.
- Slime Eel- Eels that swim around in industrial waste. They pin you down with a sticky saliva, then spits acid at you.
Returning Enemies[]
- Probes- Now, they're upgraded into having rotating blades and flying towards you at vast speeds.
- Repixilized Police Drones
Obstacles[]
- Laser Grid- High-powered deadly lasers which will damage you when touched. Moving lasers will only take away a minimum amount, but laser fields will kill you entirely. These lasers will be gone once you deactivate the security system.
- Turrets- These guns are rapid-firing and will attack anything that gets into it's spotlight. The color of the light depends on the situation. Green means it's all clear, yellow means caution, and red means it will begin firing. These turrets will be gone once you deactivate the security system.
- Energy Field- Walls of deadly energy which will block any passage unless it is shut down. Touching them will take away half of your health. They will be gone entirely when you deactivate the security system.
- Motion Sensors- They flash every 5 seconds. When it catches you moving, it will sound the alarm and call in enemies. The only way to avoid it is to stop moving the moment it flashes. These sensors will be gone when you deactivate the security system.
Villain Appearances[]
DoodleBob- the very fist Mini boss you fight. Viral Vi-Tor started to get smart and bring forth more of The players' past rivals. armed with the magic pencil.
- Health: 200 (Harmed only by the magic pencil)
- Aiding Enemies: Poorly-drawn versions of past non-boss and non-guest star enemies.
Plankton- Viral Vi-tor created a giant verson of Plankton driven by the actual Plankton! appears mid-early level.
- Health: 800 (Only to the helmet)
- Aiding Enemies: Plankton's Family
Hank the Mutant Frog- Hank is back, only he has stronger lasers and a bigger jetpack.
- Health: 300
- Aiding Enemies: Hank's Zombies, Zombies
Dr. Blowhole- Has an upgraded flying version of his scooter which has an invisable shield that protacts him, and he has rapid-firing laser guns. He appears at the entrance of factory.
- Health: 450
- Aiding Enemies: Lobsters and Chrome Claw
Chrome Claw- Appears in between battling Blowhole.
- Health: 600 (Doing 100 damage switches bosses).
- Aiding Enemies: Lobsters
The Red Squirrel- He appears once you enter the factory inside a testing chamber, meaning he has various means of killing you such as chainguns, grenade launchers, robots, obstacles, and so on. He soon comes out wielding a plasma pistol, and that's when you can strike. Do this 3 times, and he smashes into the chamber with a giant robot suit.
- Health: 700
- Aiding Enemies: Chamber obstacles, Repixilized Police Drones, and Probes.
Amarillo Kid- He shoots golf balls from a safe distance while guarding an elevator. He launches them when you come too close, so the only way to tackle him is to hit the balls back at him.
- Health: 5 (-1 for each ball hit)
- Aiding Enemies: Probes
Anima- Appears in a dark hallway. He summons Anima-lings, and will occasionally control your allies until you should shine some lights on him to hurt him.
- Health: 200 (Invincible in the dark, light takes away 20 points)
- Aiding Enemies: Anima-lings, weaker and greener versions of Anima which charge directly at you.
Emperor Jerky- The former emperor of Ichthyos now stands in the control room and is guarding the controls for the security system. Once you defeat him, all obstacles will be disabled. He has a laser pistol which he will fire if you come too close, so you must use the environment to your advantage.
- Health: 400
- Aiding Enemies: Repixilized Police Drones
Dead-Eye Monroe- He is back, and resides in another testing chamber, where he has made several versions of his tail chaingun. He will fire whichever tail you come in contact with until you destroy them. Once they're all destroyed, he will come out and fight you himself.
- Health: 680
- Aiding Enemies: None.
Mack Salmon- His fake human body now fires missiles, and he fights alongside the Mutant Alligator Gar from the show. These missiles can be smacked right back at him.
- Health: 900
- Aiding Enemies: Probes, Mutant Alligator Gar (Health: 440)
The Flying Dutchman- The Flying Dutchman appears and blows snot fireballs at you. He also has heat vision. And be careful against his mind-control ability.
- Health: 910
- Minions: Ghostly Pirates
Robot Factory[]
You make it out of the weapons facility, now you have to get through the Robot Factory where many kinds of robots are built. There are about 7 robot types that you must figure out how to defeat. Try using your power-ups to improve your fighting with these buckets of bolts. There are also advanced robot superweapons made from classified projects that you must be ready to defeat.
Enemies[]
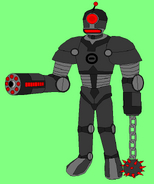
- Supersoldier Robots- Robotic versons of Robot Iron Men, but with advance weapony.
- Gammatrons- Robots that have gamma-ray vision. Can be defeated with only a single attack.
- Prowlertrons- Agile robots that leap at you from nowhere. Be ready at the precise moment to wallop the bot, and be sure to use the Chronocon.
- Grievotrons- General Grievous-like robots that wield 4 katanas. Stay out of it's range. It can also leap at you from a long distance, so be ready to leap out of the way. The only way to destroy these bots is by using the strongest power-up and the Chronocon.
- Adaptotrons- A robotic soldier that adapts, or can copy a player's actions. Like if a player threw a Plasma Grenade, the Adaptotron would do the same thing. The only way to defeat it is to be quick enough to dodge it's copying actions and destroy it without effort.
- Portotrons- Robots that can teleport anywhere, and effectively avoid attacks. Defeat it using the Laser Whip.
- Blendotrons- Robots with built-in cloaking devices, allowing them to become invisible. The only way to beat them is to use the Homuzooka.
Returning Enemies[]
- Mad Scientist
- Probes
Obstacles[]
- Laser Grid- The same as last level. Will be shut down when the security system is disabled.
- Turrets- The same as last level. Will be shut down when the security system is disabled.
- Energy Fields- The same as last level. Will be shut down when the security system is disabled.
- Audio Sensors- Much more difficult than motion sensors. The trick is to move as quietly and as slowly as possible. Running across it will activate the laser field built below the floor and take away half of your health. Will be shut down when the security system is disabled.
Mini Bosses[]
James Butterfly 2.0- James is now resurrected as a mega-armed robot meant to destroy you once you get half as close to the entrance. Once you defeat him, you're free to continue.
- Health: 870.
- Aiding Enemies: Supersoldier Robots
Jerk Beetle 90210- A robotic and repixilized version of Jerk Beetle whom you encounter when you reach the entrance to Audrey II's chamber. He is not in a position to lose again, but when he loses this one, he's going to wish he hadn't.
- Health: 1040.
- Aiding Enemies: Supersoldier Robots, Adaptotrons
Hal 3000 1/2- Now upgraded as a robot-smashing machine that is the guardian of the entrance to the control room.
- Health: 990
- Aiding Enemies: Probes, Gammatrons
Drillworm Prototype- An incomplete Mega-Drillworm that was thankfully never completed before you arrived. The best you can do is to destroy it before it becomes a threat. It has the same abilities as the last Drillworm, except they're much stronger.
- Health: 13 (Find a way to take down the security shield)
- Aiding Enemies: Mad Scientists, Supersoldier Robots
Mega Ox Prototype- Another incomplete model of a previous boss that you must destroy. But it's still functional and fires missiles. You must find a way to disable the security shields and destroy it.
- Health: 612
- Aiding Enemies: Mad Scientists, Supersoldier Robots.
Villain Appearances[]
Ruber- Ruber has been upgraded with a robotic body, with only his head organic, and his griffin is robotic as he rides him. They both guard the entrance of the factory, and you must defeat them in order to move on.
- Health: 560
- Aiding Enemies: Robot Griffin (Health: 12, a single strike can disable him), Supersoldier Robots
Audrey II- Now a giant plant cyborg who resides in a cybernetic testing chamber.
- Health: 300
- Aiding Enemies: Supersoldier Robots, Mad Scientists, Probes.
Darkness Qui- Resides in the control room as a computer with the memories of the original person after an accident that killed her. She controls all the security in the factory, and shutting her down with shut down the security system. Afterward you must make it through a hall guarded by robots.
- Health: 820
- Aiding Enemies: Narcotic and Celsius clones. Narcotic clones shoot chemical balls, while Celsius clones breath fire.
Xerxes XX- A surpise boss after Darkness Qui's defeat. He guards the exit and is now inside a robotic exo-suit.
- Health: 650
- Aiding Enemies: Supersoldier Robots, Gammatrons, Grievotrons.
Viral's Stronghold[]
You have finally made it to Viral's Stronghold. And it is a massive place, and incredibly protected. Once you find a way inside, you must find a map of the Stronghold. Once you do, you'll find that there's a teleporter on the top of one of it's towers which you can use to teleport yourself to the Pixiliminator, and stop this madness. But first, you must deal with a boatload of Villains and Darkspawn.
Enemies[]
- Repixelated versions of past common enemies.
Returning Enemies[]
- Supersoldier Robots
- Gammatrons
- Prowlertrons
- Adaptotrons
- Blendotrons
Obstacles[]
- Laser Grid- The same as before. Will be shut down when the security system is disabled.
- Turrets- The same as before. Will be shut down when the security system is disabled.
- Energy Fields- The same as before. Will be shut down when the security system is disabled.
- Motion Sensors- The same as before. Will be shut down when the security system is disabled.
- Audio Sensors- The same as before. Will be shut down when the security system is disabled.
Villain Appearances[]
Hydra- The monster from Hercules is the guardian of the energy gate.
- Health: 1200
- Aiding Enemies: None
Dark Cynder: Cynder has been captured and turned into her dark self again, and is going to fight you in a hidden booby trap in the stronghold. Defeat her and restore her good side, and she may give you a helping hand.
- Health: 1000
- Aiding Enemies: None
Mirage- The evil cat goddess and the handler of Dark Cynder has come to get you for taking her away. She will block your way to exiting the booby trap, and the only way to move on is to defeat her.
- Health: 740
- Aiding Enemies: Repixelated common enemies
Dr. Nefarious- He comes back, and this time, he fights on his very own once you enter the stronghold, firing shockwave bombs and lasers at you, and he flies while Lawrence flies in a pod and drops disablers which will make you dizzy for 5 seconds.
- Health 770
- Aiding Enemies: Lawrence (Invulnerable, but the pod can be disabled temporarily), Supersoldier Robots, Blendotrons
Emperor Fang- He and Othello are being mind-controlled by Vi-Tor into fighting for him. They both drive a Supersoldier Robot suit while Othello helps manage it through healing until he is disabled.
- Health: 960
- Aiding Enemies: Othello (Health: 300)
Dark Dragon- Steals Fang and Othello's robot suit and tries to show how a 'real villain' handles it. He blocks the path to the courtyard, so you'll just have to beat him in order to continue.
- Health: 1500
- Aiding Enemies: Supersoldier Robots, Gammatrons
Caption Hook- He is back, and he put his ship into flight mode and is now attacking you from the air of the courtyard. Little does he know that Tick-Tock has clung onto the ship during takeoff and is waiting to chew on the Captain regardless of no water. You must find a way to get onto the ship and confront Hook head-on. His crew will slide down on ropes and try to kill you, and Tick-Tock will attack you every chance he gets.
- Health: 700
- Aiding Enemies: His pirate crew, and an unintentional Tick-Tock.
The Elemental Titans- Though they are only as big as a troll due to a work in progress, the Darkspawn Elemental Titans stand in your way once you're in the middle of the courtyard, coming through a hidden platform in the ground. Energy fields will surround you until you take these guys down.
- Health: 2000 each
- Aiding Enemies: None
Hades- Once you get out of the courtyard and enter the second tower, you'll find another booby trap where the imfamous Lord of the Dead wants to send you to the Underworld.
- Health: 770 (Though immortal, he will retreat as soon as he's had enough)
- Aiding Enemies: Gammatrons
Ursula- Once you get past another bit of security, you'll get caught in an underground aquatic booby-trap, and once you try and get through the waterways without drowning, you'll enter Ursula's chambers, where the Sea Witch will not allow you to go any further. But because she doesn't have the trident, she can't be her giant self, so you're at least in luck.
- Health: 560
- Aiding Enemies: Flotsam and Jetsam (Health: 300 each. Though reformed, Sandy disliked them and made them aiding enemies)
Oogie Boogie- When Ursula is defeated, you take the elevator back to the surface and find a casino where Vi-Tor let his minions gamble. This is also where the groovy Boogeyman resides. This room is laced with booby traps, and the only way to beat Oogie Boogie is to catch him and pull his strings. Some places are just dance fights, and you must complete them in order to continue.
- Health: 1 (Just reach him and attack him, and you'll be unable to use your powerups due to all the obstacles)
- Aiding Enemies: None
Jafar- Jafar appears at the third tower. While you don't find the teleporter there, you find the security system controls, but it is guarded by Jafar, who magically turns the room into a platform battlefield.
- Health: 800 (Normal), 1000 (Snake), Invincible (Genie, Lamp: 200)
- Aiding Enemies: Magical non-boss clones.
Maleficent- Once the security system is off, you'll find that the teleporter is in the final tower, and with the security system off, it will be easy. But Maleficent, the Mistress of all Evil, senses this, and is coming to stop you however she can. You must find a way to get to the courtyard while running and dodging whatever Maleficent can throw at you. Once you make it there, she will become her dragon form, and you must take her down.
- Health: 1000
- Aiding Enemies: Goblins.
Lord Cobra- He has had enough since he was the one left in charge of the stronghold. So he decides to turn on the emergency protocol and block all passages in the courtyard through energy fields, including the sky. Mang himself teleports there and tries to end it himself.
- Health: 800.
- Aiding Enemies: None
Hexxus- Once Cobra is through with fighting, he will activate the toxic vents and allow the Darkspawn Lord of Destruction to have a turn fighting. He will pump deadly toxins inside the area and you must destroy the vents before you die of poisoning. This will not only clean the area, but it will take away Hexxus' power, and you are free to attack since he's tangible.
- Health: 1500 (Intangible when toxins are in the area)
- Aidng Enemies: Mini Hexxus heads
Joe the Fish- This time, the area floods up completely with water, and with the only air sources being bubble vents, Joe and his Shark assistant are called in to deal with them. He will be riding the Shark, and once he is disabled, you are free to strike Joe.
- Health: 500
- Aiding Enemies: Piranhas, Electric Eels, Shark (Health: 12 hits will disable him)
Malefor- With Cobra losing his patience, he is now forced to call in the toughest Darkspawn available. His battle will damage the energy field enough times to break it, allowing you freedom to enter the fourth tower and make it to the teleporter.
- Health: 1880
- Aiding Enemies: None
Hank the Mutant Frog- This guy is proving that he cannot be held back that easily. Once Malefor accidentally destroys the surrounding energy field, and it seems that the entrance to the fourth tower is clear, Hank turns on a backup energy field to surround it, so you must fight him in order to get the codes to unlock it. Since he is too quick to take down with an ordinary power-up, it looks like you'll have to use the Homuzooka.
- Health: 5 (Though he is too quick on his improved jetpack)
- Aiding Enemies: Supersoldier Robots, Gammatrons, Blendotrons
Dennis- When you're inside the final tower at last, Cobra had went ahead and sent Dennis to 'exterminate' you. He will be chasing you while you search the tower looking for the way to the teleporter, and once you reach the room where it is, you'll have to fight him so you can activate the portal and get the job finished. After that...it won't be very pretty for Lord Cobra when he is depixelated.
- Health: 750.
- Aiding Enemies: Gammatrons
Floating Generator[]
This is it! You're finally at the Pixiliminator's apparatus. Now, you must find a way to self-destruct the Pixiliminator, and win the game. You'll have to get past several security measures and enemies in order to find an emergency self-destruct button. However, once you find it, you cross paths with the Evil Lord himself: VIRAL VI-TOR! Now, you must defeat him in order to put an end to this madness once and for all.
Returning Enemies[]
- All common enemies.
Obstacles[]
- Laser Grid- The same as before. Will be shut down when the security system is disabled.
- Turrets- The same as before. Will be shut down when the security system is disabled.
- Energy Fields- The same as before. Will be shut down when the security system is disabled.
- Audio Sensors- The same as before. Will be shut down when the security system is disabled.
Mini Bosses[]
James Butterfly 2.0- Because he had failed so many times, Vi-Tor recently fired him. But instead of leaving, James decides to redeem himself by trying to kill you. He does this when you reach the control terminal for the Pixiliminator's security system. Defeat him, and he's gone for good, and the passages to main areas won't be blocked anymore.
- Health: 1000
- Aiding Enemies: None (Because he was fired)
Chapter Boss[]
Viral Vi-tor- The very supervillain you must stop at all costs, and he's been expecting you. He is all-powerful, but not invulnerable. Defeat him, and destroy his generator to win the game once and for all.
- Health: 101010000 (Three health bars and three rounds)
- Aiding Enemies: All common enemies.


